
What is mango?
A native macOS terminal for people who work with AI coding agents.
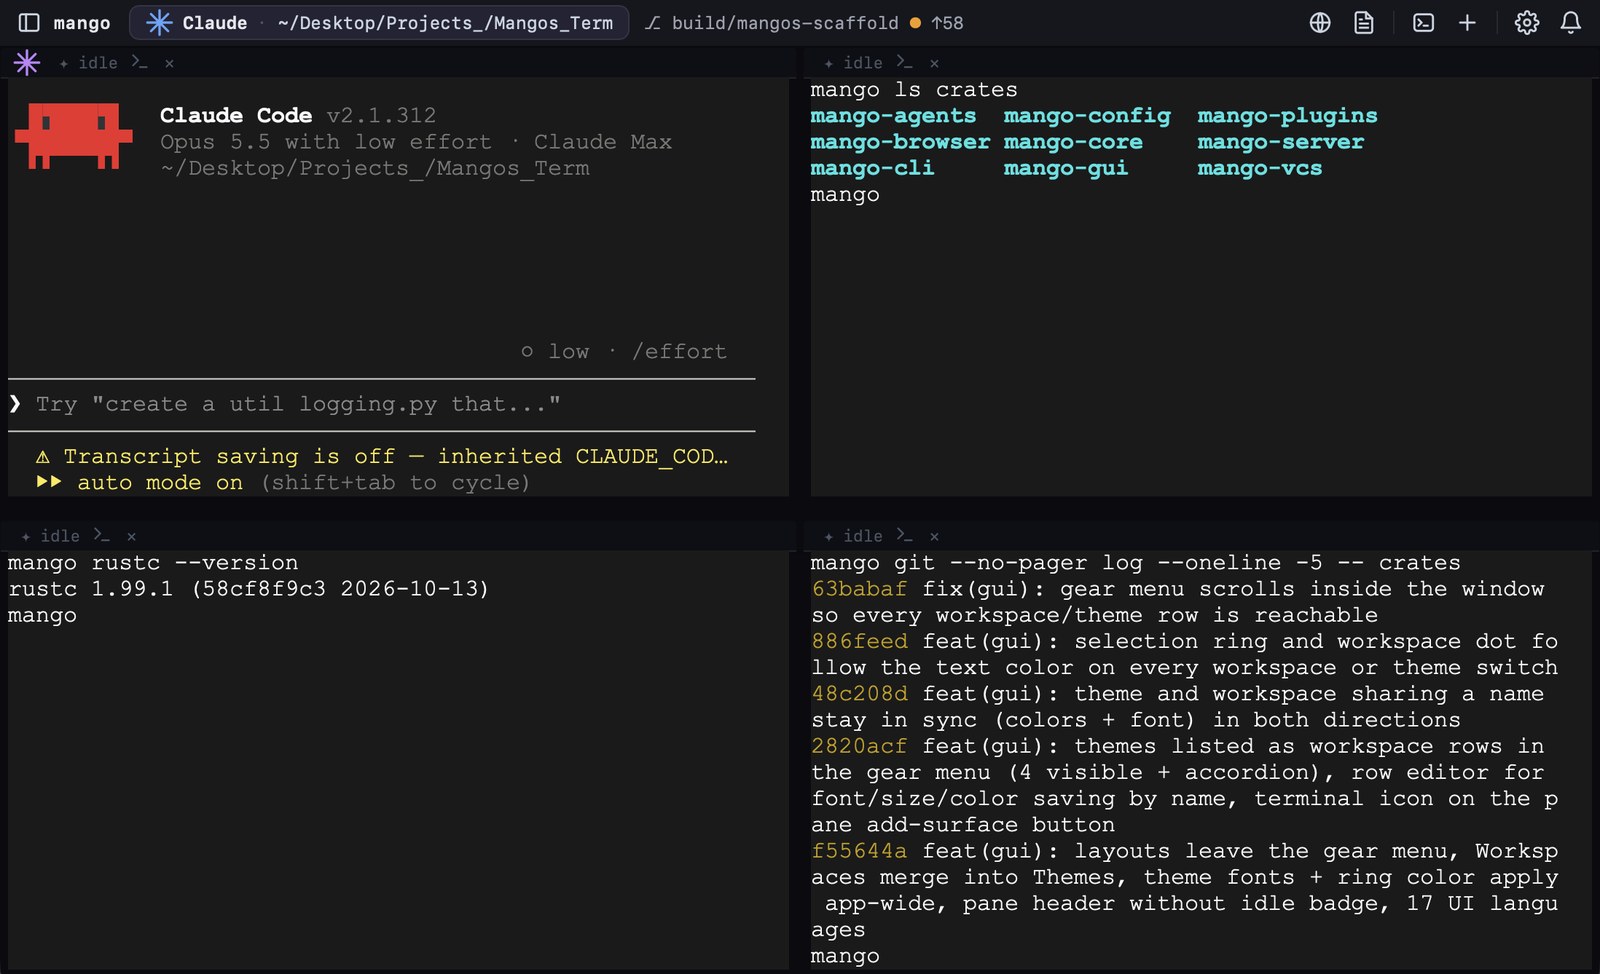
mango runs your shells in panes you can split, stack and multiply. It notices which AI CLI is running in each pane, tells you when an agent finishes or needs input, and keeps your layouts, colors and fonts as named workspaces. It is written in Rust and ships as one app plus a mango command-line tool.
When to use mango
- You run several agents or shells at once and want them side by side.
- You want to know at a glance which pane has an agent working, blocked or done.
- You switch between projects and want each one to come back with its own layout and look.
- You want a browser, an editor and a diff review next to your terminals in one window.
Go to Install, then follow Your first session.
Install
Two ways to get mango on your Mac, plus the shell command.
Download the DMG
- Download
mango-0.3.2.dmgfrom the download section. - Open it and drag mango onto Applications.
- Launch mango from Applications. macOS 13 or later is required.
Install with curl
The install script finds the newest release on GitHub, downloads its DMG, copies mango.app into /Applications and cleans up after itself.
curl -fsSL https://raw.githubusercontent.com/dara-greicy7/Mangos/main/scripts/install.sh | shSet MANGO_INSTALL_DIR to install somewhere else, for example a folder you can write to without sudo.
Install the shell command
Choose mango › Install Shell Command (mango)… in the menu bar, or the same row in the gear menu, or the Shell command step of the Welcome Tour. mango links its bundled binary to /usr/local/bin/mango, or to ~/.local/bin/mango if the first folder is not writable, and tells you if that folder is missing from your PATH.
Your first session
From a fresh launch to four panes with an agent running, in a minute.
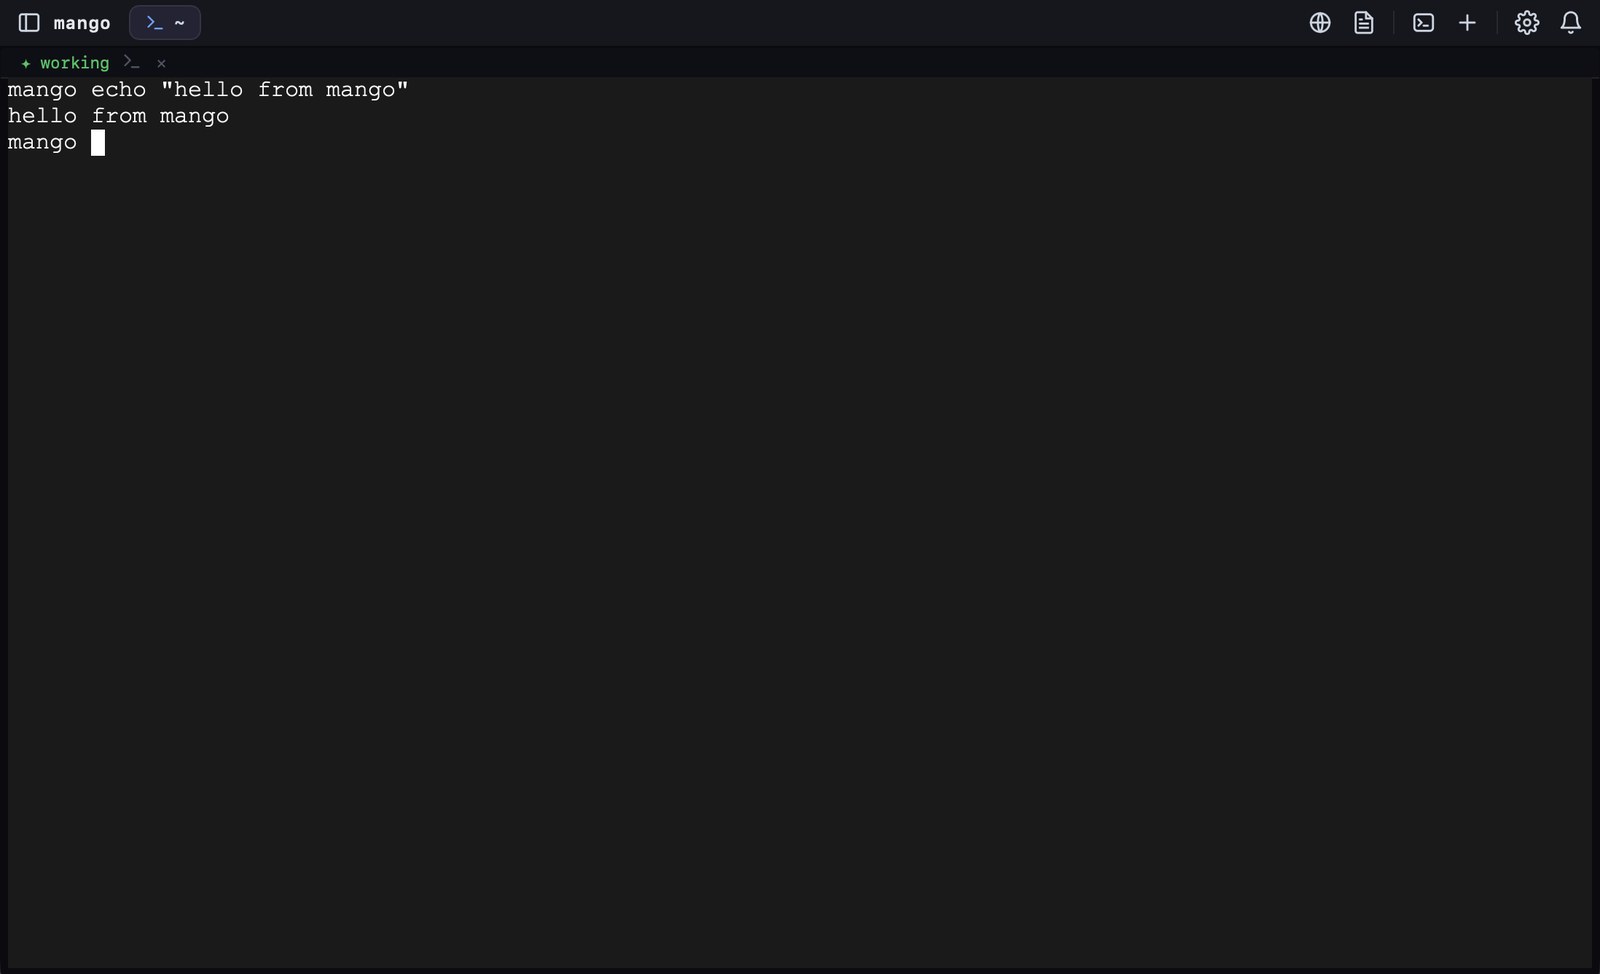
- On first launch the Welcome Tour opens. Pick a theme, a font size and a starting layout, or press Skip.
- Press ⌘⇧D for the Quad layout: four panes in a 2×2 grid.
- In one pane, start your agent, for example
claude. Its badge appears in the pane header and in the AI providers panel. - Press ⌘\ to open the side panel and see every provider's state.
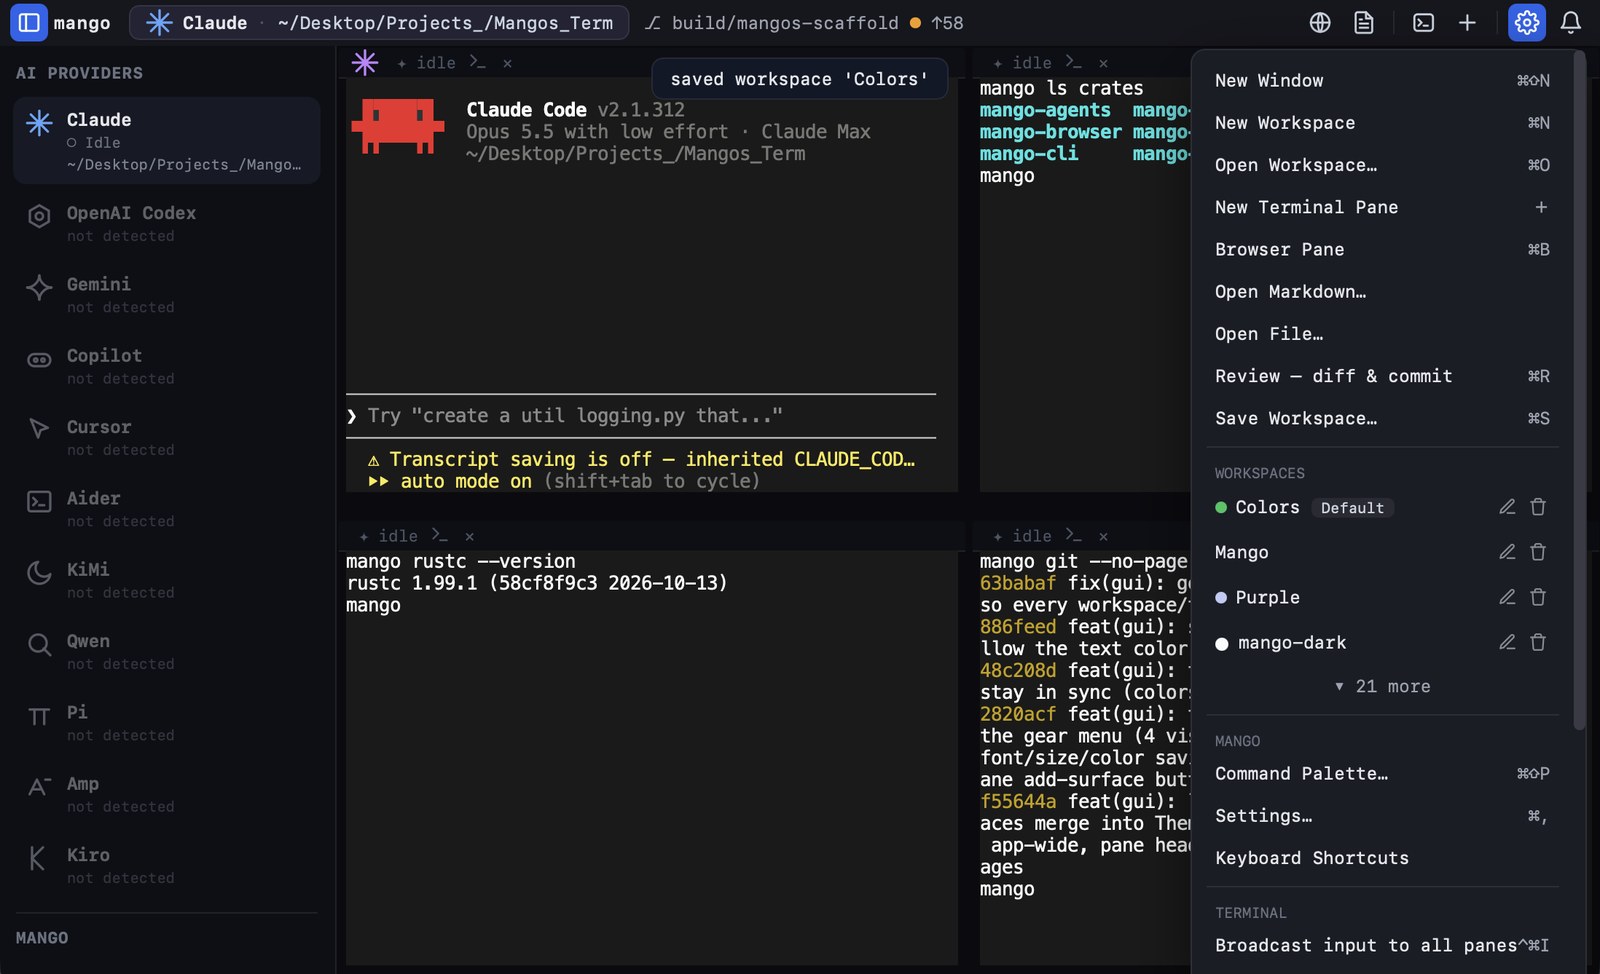
- Press ⌘S and name the workspace so you can reopen this setup later with ⌘O.
Hold ⌘ for about a second to see shortcut hints on screen.
Welcome Tour and Quick Guide
Guided setup on first launch, and a card of shortcuts to the main features.
Welcome Tour
It opens automatically the first time you launch mango. Open it again any time from Help › Welcome Tour… or the gear menu. The steps are:
- System check: your shell, home folder, config path and whether the CLI is installed.
- Appearance and Terminal look: theme and font size (8 to 40).
- Keyboard preset: mango, Terminal.app or tmux.
- Starting layout: Single, Two vertical, Two horizontal or Quad.
- Shell command: install
mangoon your PATH.
Quick Guide
A card with six buttons that each run the feature: Panes & layouts, Browser pane, Monaco editor, Command palette, AI providers and Workspaces. It shows at launch until you clear its "show at launch" box. Reopen it from Help › Quick Guide.
Action menu and command palette
The gear button in the top bar is the one menu for everything: new window, workspaces, panes, browser, files, review, settings and more. Open it with a click, a right-click on the top bar, or ⌘⇧K. The command palette, ⌘⇧P, lets you type to find any command.
Layouts and adding panes
Pick an arrangement, then grow it one set at a time.
Pick a layout
Click the layout button in the top bar and choose:
| Layout | Result |
|---|---|
| Single pane | One pane fills the window. |
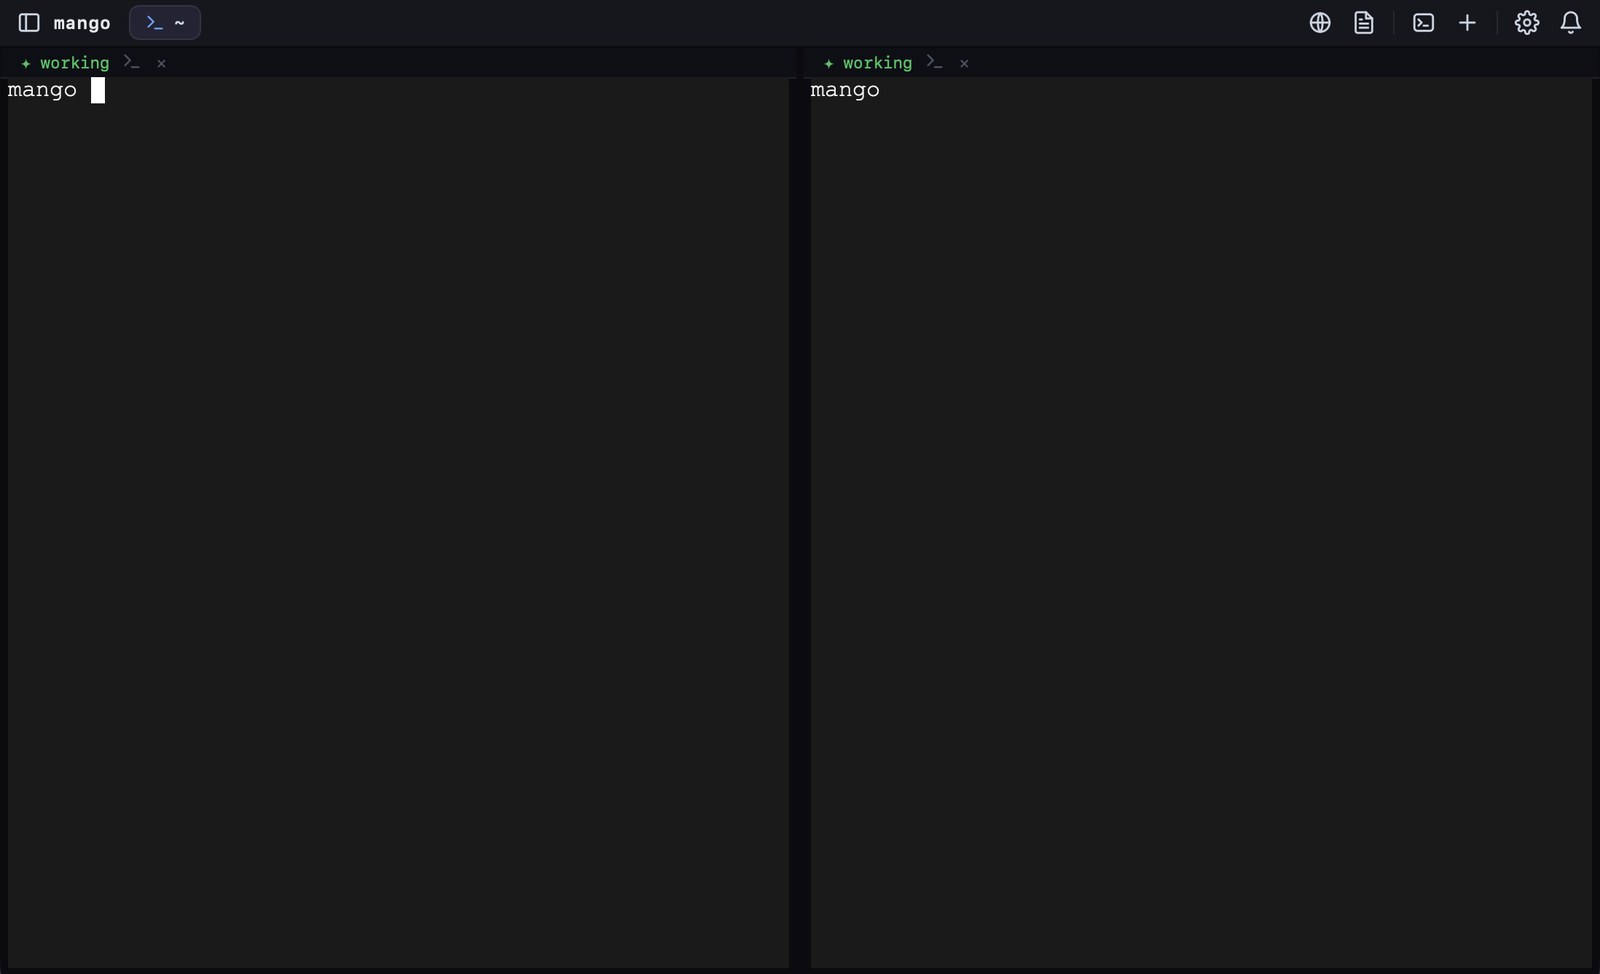
| Two vertical | Two panes side by side. |
| Two horizontal | Two panes stacked. |
| Quad, ⌘⇧D | Four panes in a 2×2 grid. |
Add a set with +
The + button, or ⌃⌘N, adds one more set of the current layout: one pane in Single, two in either Two layout, four in Quad. Keep pressing it to fill the screen.
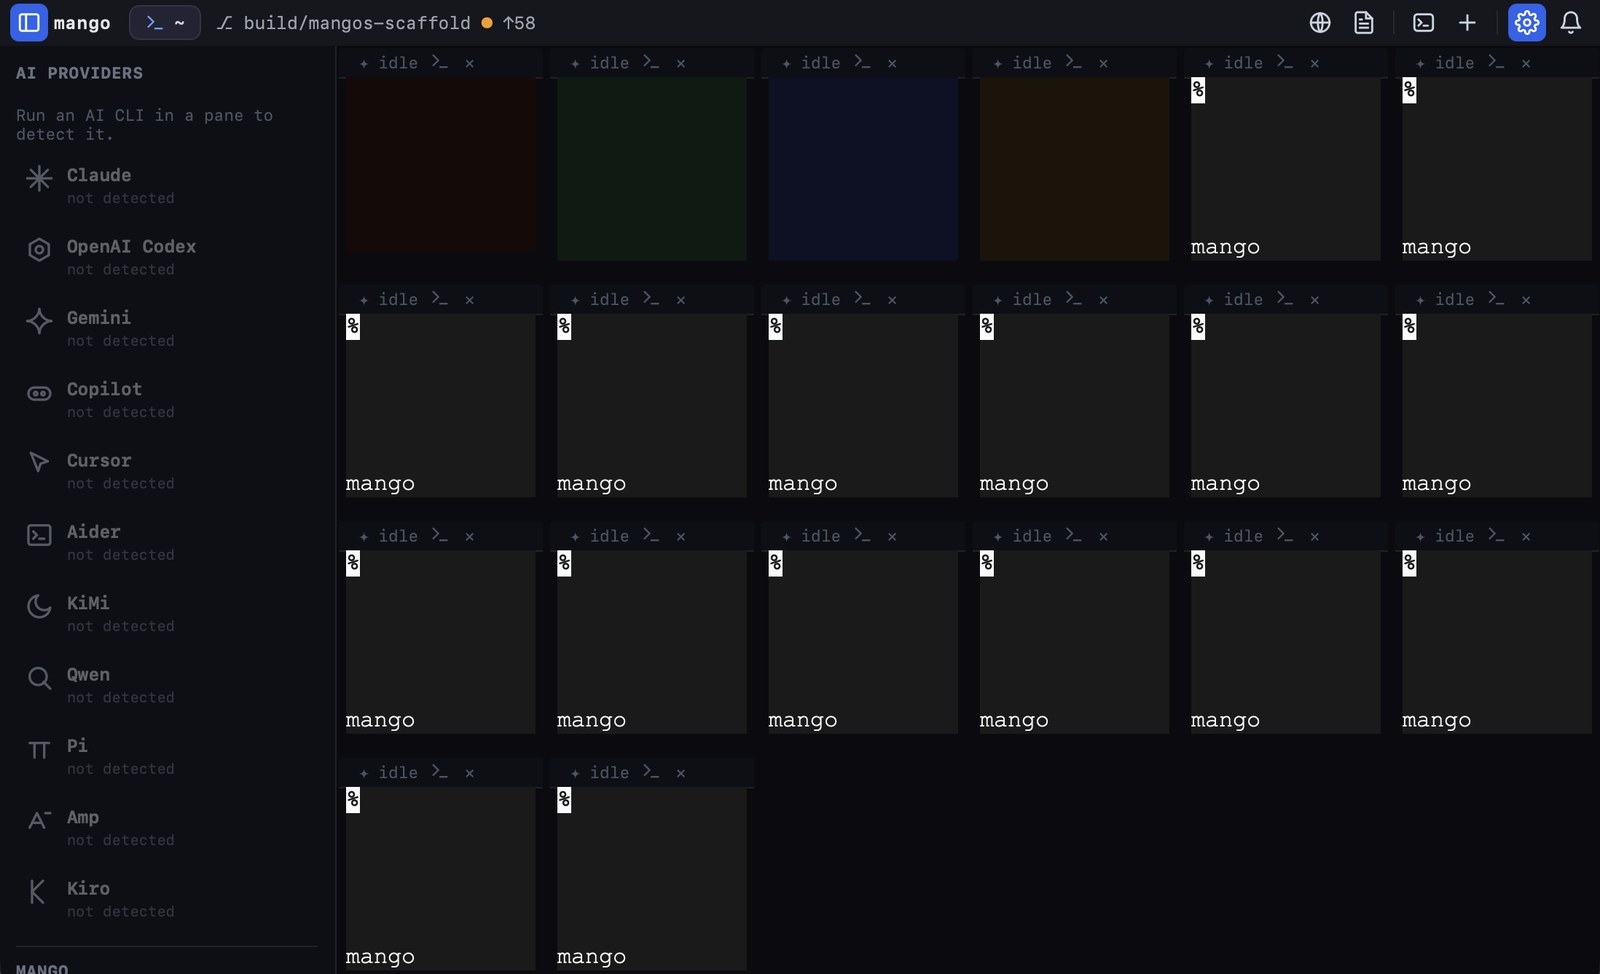
Close a pane
Click ✕ in the pane header or press ⌘W. If the pane is still working, mango asks first; you can turn that off in Settings › Terminal. The last pane cannot be closed. Settings › Terminal also has "Warn before replacing a busy layout".
Tabs inside a pane
Each pane can hold several terminal tabs.
Click the terminal icon in a pane header, or press ⌘T, to open a new tab in that pane. Double-click a tab, or press ⌃⌘R, to rename it.
| Action | Keys |
|---|---|
| Next / previous tab | ⌘⇧] / ⌘⇧[ |
| Move tab right / left | ⌃⌘⇧] / ⌃⌘⇧[ |
| Move tab to the next pane | ⌃⌘M |
| Close other tabs | ⌘⌥W |
| Select tab 1 to 9 | ⌃1 to ⌃9 |
Workspaces
Save a layout with its folders and look, then bring it back in one click.
Save, open, switch
| Action | How |
|---|---|
| Save workspace | ⌘S or gear › Save Workspace… |
| New clean workspace | ⌘N |
| Open a workspace | ⌘O, or click its row in the gear menu |
| Open workspace 1 to 9 | ⌘⌃1 to ⌘⌃9 |
| Next / previous workspace | ⌘⌥↓ / ⌘⌥↑ |
| Next / previous in the same group | ⌘⌥⇧↓ / ⌘⌥⇧↑ |
| Reopen the last closed workspace | ⌘⇧T |
Saving with an empty name auto-names it (solo, duo, quad or grid-N plus a number) when "Auto-name workspaces saved without a name" is on in Settings › General.
Edit a workspace
In the gear menu, click the pencil on a row. You can change its name, group, a checklist (one item per line, start a line with [x] when done), font family, font size and text color. The trash icon deletes it after a confirm.
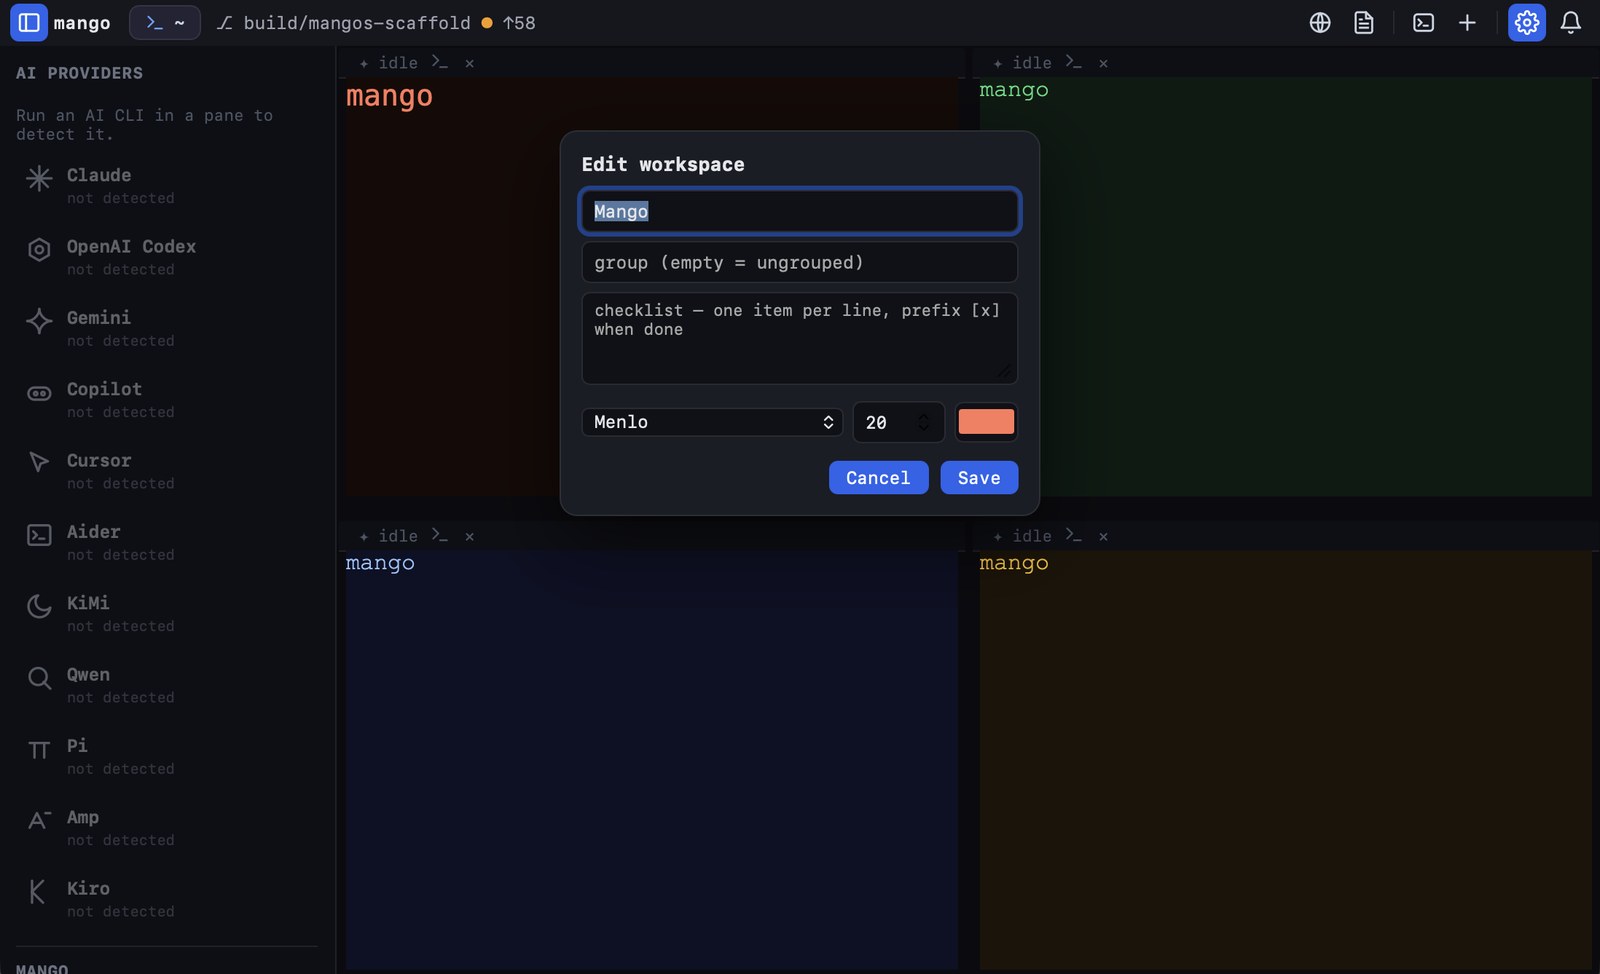
Groups and the boot workspace
Give workspaces a group name and they appear together in their own section of the gear menu. In Settings › General choose a Boot workspace to open at launch (its row shows a Default chip) and whether new workspaces land at the top or bottom of the list. The gear menu shows four rows; open the rest with ▾ N more.
Themes
One pick sets colors on the focused pane and fonts on every pane.
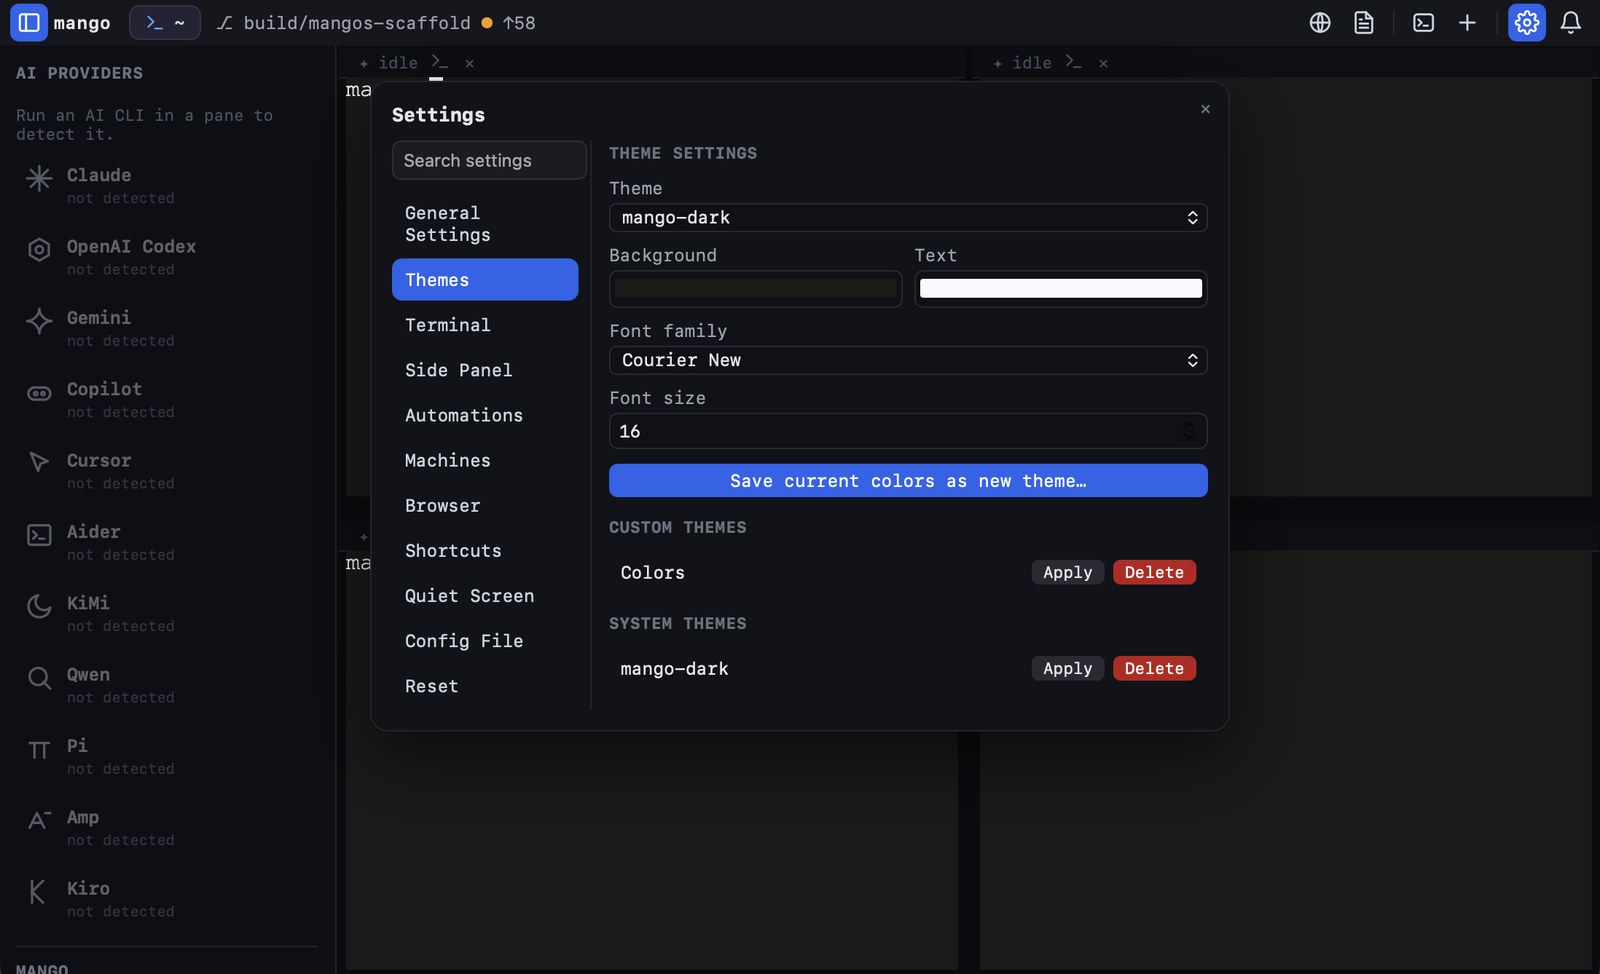
Open Settings with ⌘, and choose Themes. When you pick a theme:
- its background and text colors go to the focused pane,
- its font family and size go to every open pane,
- the selection ring around the focused pane takes the theme's text color.
Save your own theme
Set colors, font and size, then press Save current colors as new theme… and name it. Custom themes, System themes and a searchable Gallery are listed below.
Themes and workspaces stay in sync
A theme and a workspace with the same name share colors and fonts in both directions: saving the workspace updates the theme, and editing the theme updates the workspace. In the gear menu they share one list.
Import from other terminals
Settings › Terminal has buttons to import colors from iTerm2, Alacritty, Warp themes, Terminal.app, kitty and WezTerm.
Pane colors, fonts and size
Every pane can look different.
- Focus the pane you want to change.
- Open Settings › Themes (⌘,).
- Change Background, Text, Font family or Font size (8 to 32). The pane updates as you edit and the change is saved.
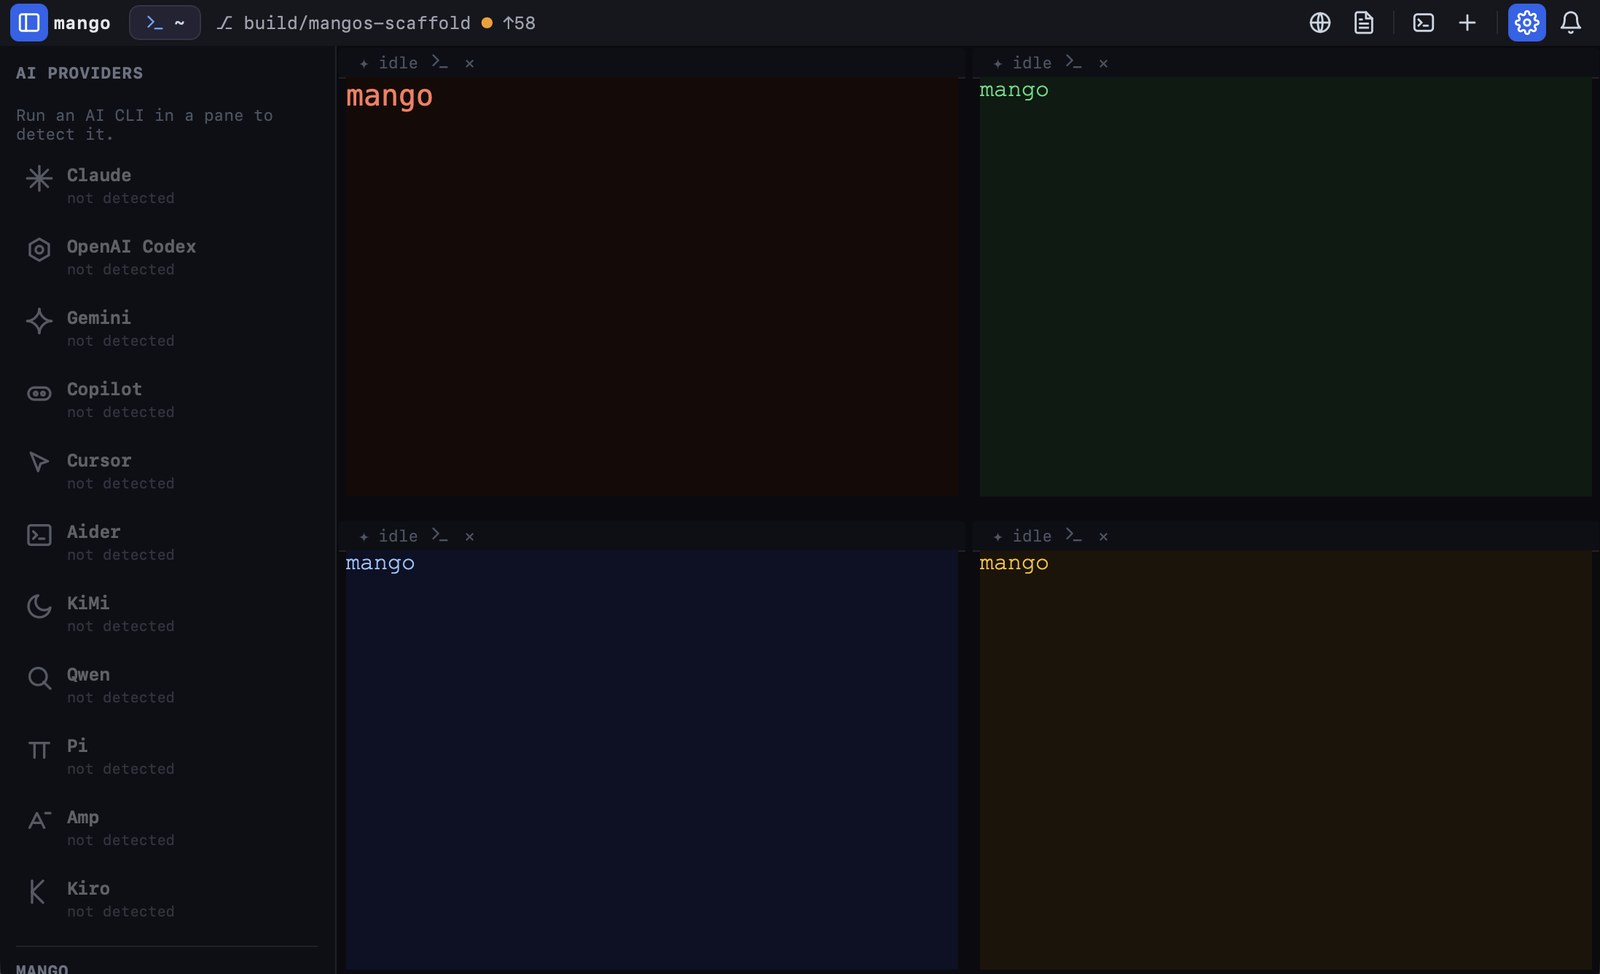
The font list starts with SF Mono, Menlo, JetBrains Mono, Fira Code, Cascadia Code, Monaco and Courier. The first time you open Settings it is replaced with every font family installed on your Mac.
| Action | Keys |
|---|---|
| Bigger / smaller / reset font in all panes | ⌘= / ⌘- / ⌘0 |
Defaults for new panes (font, size, cursor, padding, opacity, scrollback and more) are in Settings › Terminal. Settings › General has UI scale, 70% to 200%, for the whole interface.
Agent detection
A badge lights only when the agent's process is really running in that pane.
mango looks at the foreground process of each pane. Text printed in the terminal never counts, so a log that mentions "claude" does not light the Claude badge. Eleven providers are recognized:
| Provider | Matched process names |
|---|---|
| Claude | claude, claude-code |
| OpenAI Codex | codex, openai |
| Gemini | gemini |
| Copilot | copilot |
| Cursor | cursor-agent |
| Aider | aider |
| KiMi | kimi, moonshot |
| Qwen | qwen, tongyi |
| Pi | heypi, inflection |
| Amp | amp, ampcode |
| Kiro | kiro |
Working, blocked, idle
Each pane header shows ✦ working, ✦ blocked or ✦ idle. A pane is blocked when its screen ends in a prompt such as [y/n]. A blocked pane can ring, flash and play a sound.
The AI providers panel
Press ⌘\ to open the side panel. It lists every provider with its state and folder, plus listening ports, repos and branches, SSH machines and the mango menu. Choose what it shows, its width (160 to 480) and colors in Settings › Side Panel.
Notifications
Know when an agent finishes or needs you, without watching it.
Programs can send notifications with the OSC 9 or OSC 777 escape sequences; mango notify prints them for you. A notification lights an unread ring on the pane, can flash it, play a sound and run your notify command.
Where to set it up
Settings › General has the notification options:
- Agent-done ring and needs-input ring with flash.
- macOS banners, a Dock badge with the unread count, and a menu-bar item.
- Sound: synthesized (Beep, Chime or Pulse) or a sound file, a separate style for needs-input, and per-agent overrides.
- Ring color and flash style, and a Send test notification button.
- A notify command that receives
$MANGO_NOTIFY_PANE,$MANGO_NOTIFY_TITLEand$MANGO_NOTIFY_BODY.
The inbox
| Action | Keys |
|---|---|
| Show notifications | ⌘⇧U or the bell button |
| Jump to the latest unread | ⌃⌘U |
| Jump to the last prompt | ⌃⌘P |
The inbox also has Mark all read and Clear.
Review: diff and commit
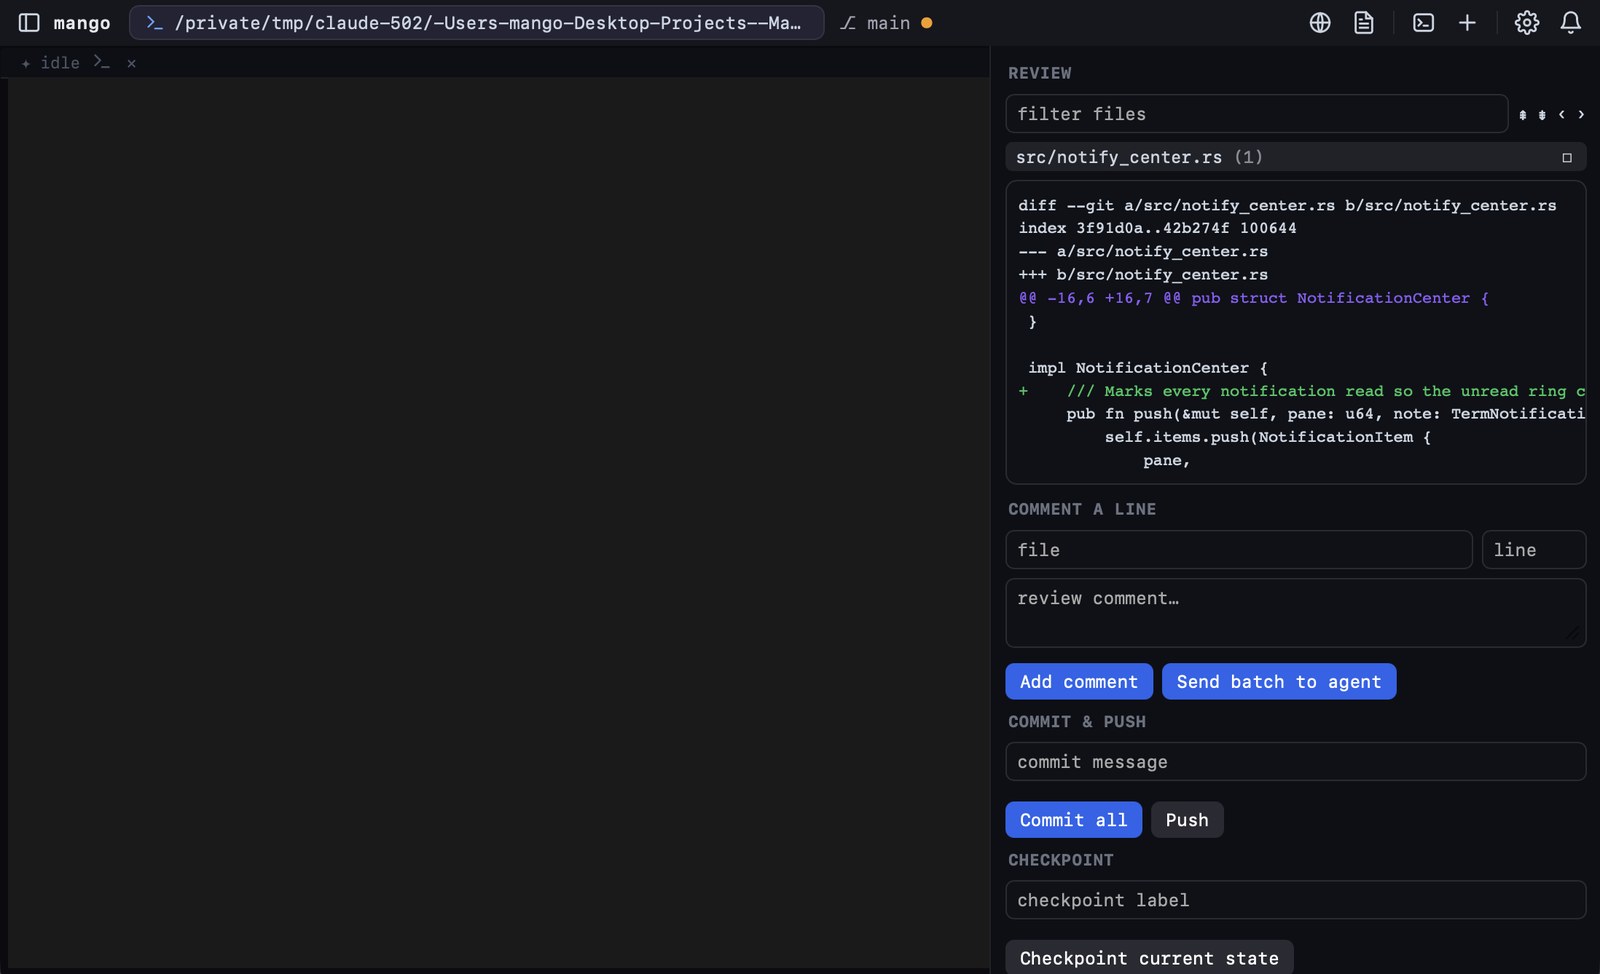
Read what an agent changed, comment, and commit, without leaving mango.
Press ⌘R or choose Review: diff & commit in the gear menu. Move between files and hunks with ⌥↑ ⌥↓ ⌥← ⌥→. Add comments on lines and send them to the agent as one batch, then Commit all and push.
Browser pane
A WebKit browser next to your terminals.
Click the globe or press ⌘B.
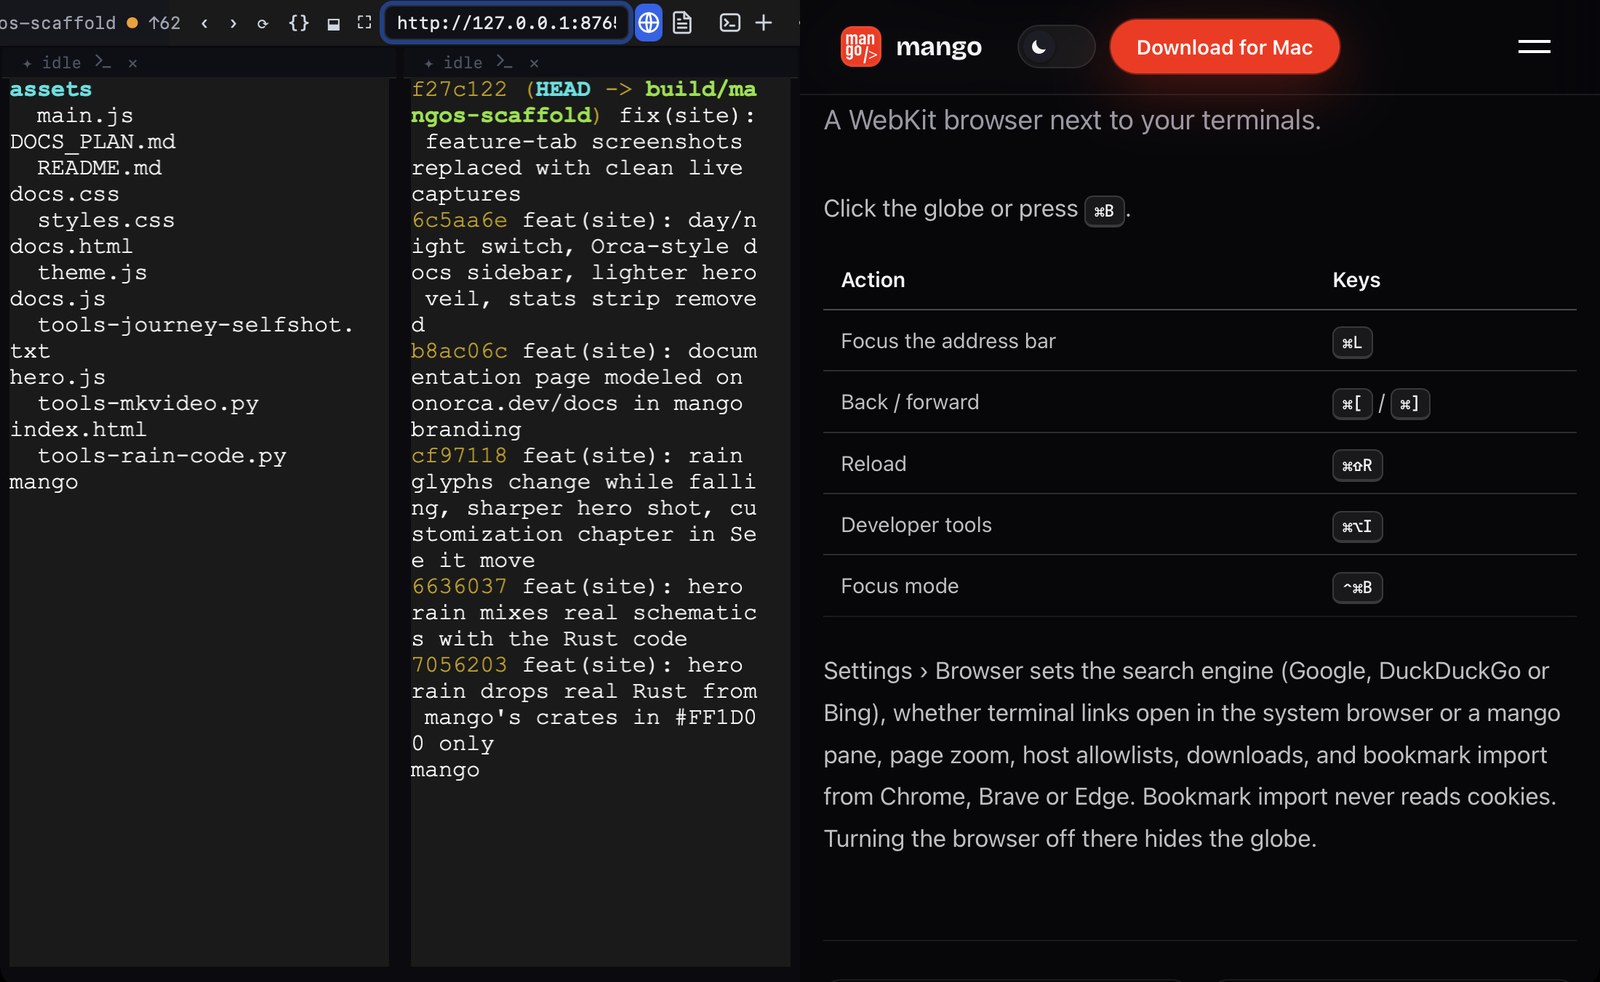
| Action | Keys |
|---|---|
| Focus the address bar | ⌘L |
| Back / forward | ⌘[ / ⌘] |
| Reload | ⌘⇧R |
| Developer tools | ⌘⌥I |
| Focus mode | ⌃⌘B |
Settings › Browser sets the search engine (Google, DuckDuckGo or Bing), whether terminal links open in the system browser or a mango pane, page zoom, host allowlists, downloads, and bookmark import from Chrome, Brave or Edge. Bookmark import never reads cookies. Turning the browser off there hides the globe.
Editor, Markdown and files
Open code and notes without switching apps.
Monaco editor
Click the document button or press ⌘E; gear › Open File… picks a file. Line numbers, wrap, minimap, syntax highlighting and tab size are in Settings › Terminal, where "Open files with" can also hand files to an external editor instead.
Markdown viewer
Gear › Open Markdown…, or ⌘-click a .md path in a terminal when "⌘-click opens .md files in the Markdown viewer" is on. Font, size and width are adjustable.
Files and screenshots
- Drop a file on a pane to insert its path, or to
cdinto a folder (Settings › Terminal "File drop on a pane"). - ⌃⌘V types the path of your newest screenshot.
- The side panel's mango menu has Notes, which save automatically.
TextBox composer
Write long prompts comfortably, then send them to the pane.
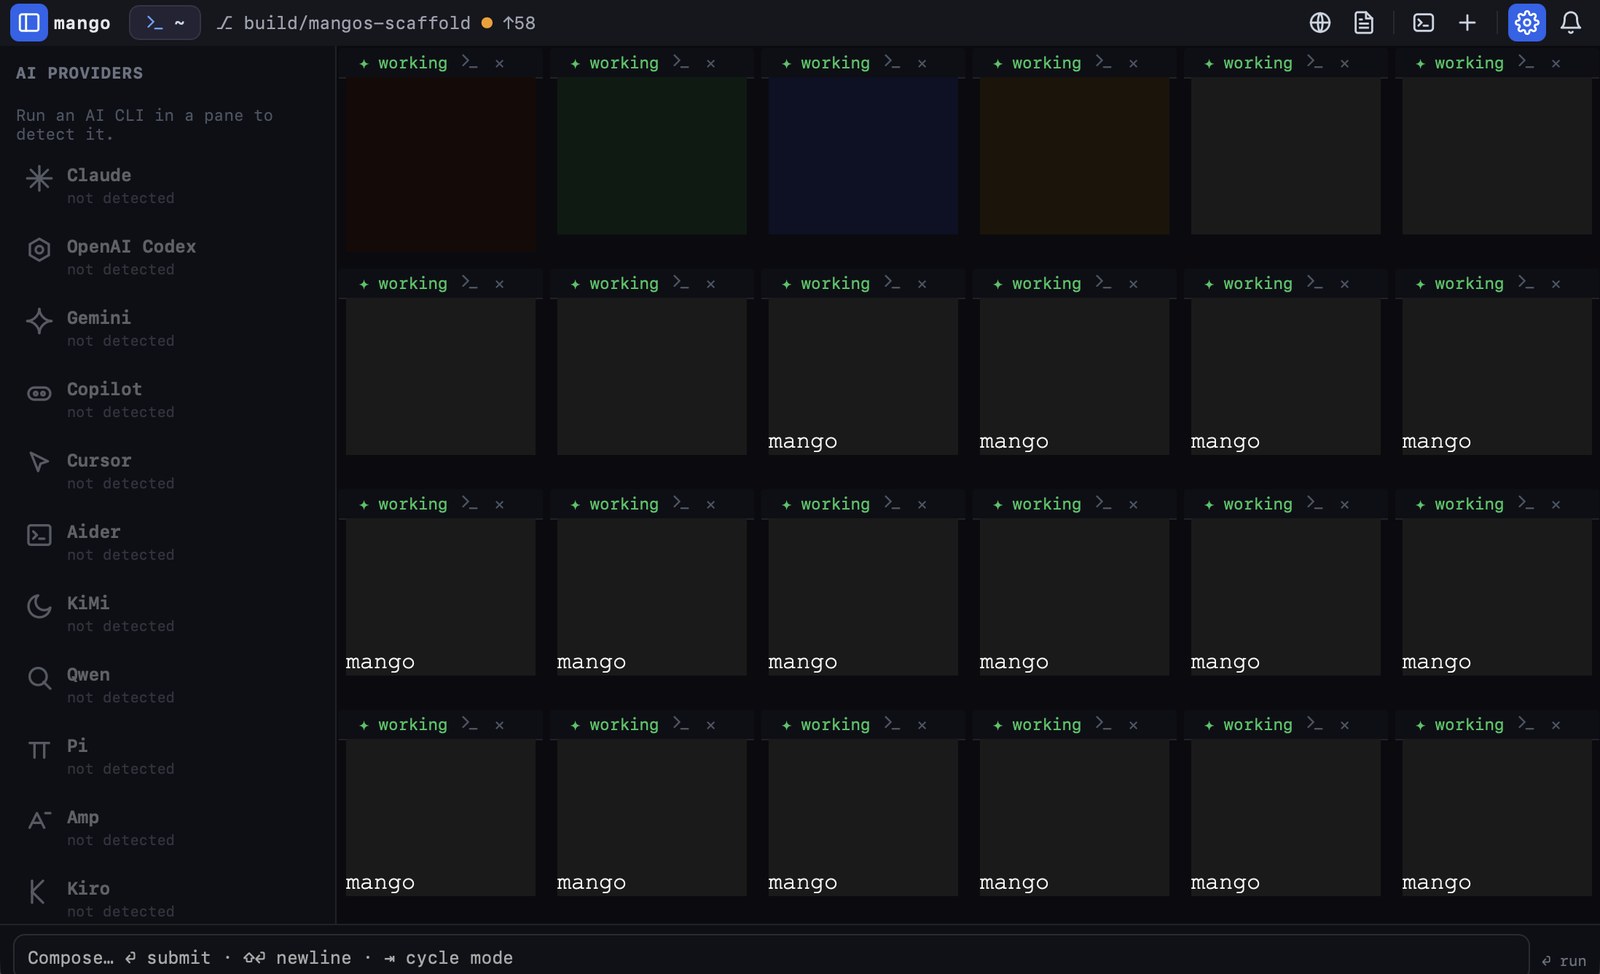
Press ⌘⇧A. Type across several lines, then:
| Key | Does |
|---|---|
| ⏎ | Submit |
| ⇧⏎ | New line |
| ⇥ | Switch between "run" (text plus Enter) and "insert text only" |
Settings › Terminal can show it on new terminals, focus it when shown, set the default mode and the maximum height (2 to 20 lines).
Find, history and triggers
Search output, reuse what you pasted, and react to text automatically.
| Action | Keys |
|---|---|
| Find in terminal / next / previous | ⌘F / ⌘G / ⌘⇧G |
| Use the selection for find | ⌘⇧E |
| Find in directory | ⌘⇧F |
| Complete a word from the scrollback | ⌘; |
| Paste history | ⌘⇧H |
| Export pane text to a file | ⌃⌘X |
| Clear screen, keep scrollback | ⌘K |
| Copy mode (j k u d g G, q to exit) | ⌃⌘C |
Paste history keeps the last 20 entries; change the size in Settings › Terminal (0 turns it off). Exported text is saved to your Desktop as mango-pane-<id>-<time>.txt, readable only by you.
Triggers
In Settings › Terminal, write one rule per line:
error\[E\d+\] => highlight
Build finished => notify
tests passed => run: say done
Each rule is a regular expression followed by highlight, notify or run: command. A trigger fires at most once every two seconds per pane. Commands get MANGO_PANE and MANGO_MATCH in their environment.
Settings reference
Open with ⌘,. Use the search box at the top to find any option.
| Section | What it controls |
|---|---|
| General Settings | Language, appearance and accent, boot workspace, where new workspaces land, quit confirmation, start new panes in the focused pane's folder, auto-naming, minimal mode, menu-bar-only mode, the global hotkey ⌃⌥⌘M, app icon, notifications, UI scale and notify command. |
| Themes | Theme, colors, font, size, saved, system and gallery themes. |
| Terminal | Defaults for new panes, cursor, padding, opacity, scrollback, copy on select, Option as Meta, WebGL renderer, ligatures, paste history, triggers, imports, editor and TextBox options, file drop and more. |
| Side Panel | Which rows to show, width, colors and fonts, and a custom HTML panel from a template. |
| Automations | Scheduled prompts to a pane with an optional precheck command, and socket mode (Full, Read-only or Off). |
| Machines | SSH machines by user@host and label. Keys are never stored. |
| Browser | See Browser pane. |
| Shortcuts | Base keymap (mango, Terminal.app or tmux), record your own combos and two-step chords, reset all. |
| Quiet Screen | A screensaver with a mascot, stars, moon, battery and date, with Start and Preview buttons. |
| Config File | Reveal or edit gui.json and session.json. |
| Reset | Restore hidden system themes, reset workspace colors or all preferences. Workspaces, themes and notes are never removed. |
Keyboard shortcuts
The defaults. Every one can be changed in Settings › Shortcuts.
App and workspaces
| Action | Keys |
|---|---|
| Action menu | ⌘⇧K |
| Command palette | ⌘⇧P |
| Settings | ⌘, |
| New window | ⌘⇧N |
| Save / new / open workspace | ⌘S / ⌘N / ⌘O |
| AI providers panel | ⌘\ |
| Focus the side panel | ⌃⌘S |
| Full screen | ⌃⌘F |
| Hide window | ⌘⇧W |
| Show or hide mango anywhere (when enabled) | ⌃⌥⌘M |
Panes
| Action | Keys |
|---|---|
| Quad layout | ⌘⇧D |
| Add a set of panes | ⌃⌘N |
| Focus left / right / up / down | ⌃⌘ + arrows |
| Zoom pane | ⌃⌘Z |
| Broadcast input | ⌃⌘I |
| Font bigger / smaller / reset | ⌘= / ⌘- / ⌘0 |
Tabs, find, browser and notification shortcuts are listed on their own pages: Tabs, Find, history and triggers, Browser pane, Notifications.
tmux keymap
With the tmux base keymap, ⌃B then: c new tab, n / p next or previous tab, , rename tab, z zoom, x close, [ copy mode.
Hold ⌘ for about a second to see shortcut hints over the window.
Command line
The mango command, after installing the shell command.
| Command | Does |
|---|---|
mango | Starts the terminal UI. |
mango notify --title T --body B | Sends a notification to the pane it runs in. |
mango server | Starts the headless server. |
mango api schema | snapshot | Prints the API schema or a snapshot of the current state. |
mango agent list | Lists panes and their agent state. |
mango agent wait --pane N --until idle | Waits for a pane to become working, blocked, idle or done. |
mango agent prompt --pane N "text" | Types a prompt into a pane (add --wait to wait for it). |
mango plugin list | link | install | enable | disable | run | Manages plugins. |
mango machine add user@host | list | status | run | Manages SSH machines. |
mango automations add --prompt P --every S | Schedules a prompt. |
mango mcp add | list | remove | export | Manages MCP servers. |
mango vault search | resume | Searches and resumes agent sessions. |
mango completions zsh | Prints shell completions for zsh, bash or fish. |
mango local-tmux [session] | Attaches to or creates a tmux session. |
mango --version | Prints the version. |
Example: wait for an agent
mango agent prompt --pane 1 "run the tests and fix failures"
mango agent wait --pane 1 --until idle --timeout-ms 600000
mango notify --title "pane 1" --body "agent finished"
Config and data
Where mango keeps your settings and how to move or reset them.
| Path | Holds |
|---|---|
~/.local/state/mango/gui.json | The app's preferences and window state. |
~/.local/state/mango/session.json | Terminal UI and server session. |
~/.local/state/mango/audit.log | Log of changes made through the socket. |
~/.config/mango/ | Registries shown in Settings › Config File. |
.mango/config.json in a project | Per-project plugin and socket overrides. |
If XDG_STATE_HOME is set, the state folder is $XDG_STATE_HOME/mango/. Settings › Config File reveals and opens these files. Settings › Reset restores defaults without deleting workspaces, themes or notes.
Languages
Choose the interface language in Settings › General.
System follows your macOS language. You can also pick English, Bosanski, 简体中文, 繁體中文, Dansk, Deutsch, Español, Français, Italiano, 日本語, 한국어, Norsk, Polski, Português (Brasil), Русский or ไทย.
Privacy and security
What mango does with your data, and what it never does.
- No telemetry. mango does not send usage data.
- One user-started network request: gear › Check for Updates… asks GitHub for the latest release. It only runs when you click it.
- Local socket for the CLI and automations: its folder is readable only by you, and Settings › Automations can make it read-only or turn it off.
- Audit log of changes made through the socket records the kind and size of each request, not its text. It rotates at 5 MB.
- Agent prompts sent through the socket are limited to 64 KB.
- Bookmark import never reads cookies, and the custom side panel runs in a sandbox.
- "Pane history replay" is off by default because it may keep secrets.
To remove everything, delete ~/.local/state/mango/ and ~/.config/mango/.